这篇文章从一个空目录开始,做一个能写文章、能本地预览、也能部署上线的博客。页面交给 Astro,正文用 Markdoc 文件保存,Keystatic 提供一个可以在浏览器里编辑文章的后台。
部署部分以支持线上 Keystatic 的 Vercel 为主,再说明 Cloudflare Pages 只托管公开静态站点时的边界。整篇教程使用通用路径和示例值,读者可以把项目名、域名和 GitHub 仓库换成自己的。
先确定项目结构
Astro 负责页面和构建。Markdoc 是 Astro 的内容格式之一,文章最终仍然是仓库里的文本文件。Keystatic 读写这些文件,并提供标题、日期、标签、封面等字段的表单。
最后会得到类似这样的目录:
src/
├─ assets/images/posts/ # 由 Astro 优化的 WebP 文章图片
├─ content/posts/       # 文章文件
├─ layouts/             # 页面骨架
├─ pages/               # 首页和文章路由
└─ styles/global.css    # 全局样式
keystatic.config.ts     # Keystatic 字段定义
astro.config.mjs        # Astro 集成和部署 adapter
文章走 Git 的好处很实际:可以在编辑器里写,也可以直接改文件;发布时提交一次,平台就能从同一份内容重新构建。
准备开发环境
安装一个当前 Astro 支持的 Node.js LTS 版本,以及 Git。先确认命令可用:
node --version
git --version
pnpm 可以用 Corepack 或 npm 安装。这里不固定某个小版本,避免读者把教程和一份过期的版本号绑在一起。使用 Corepack 时:
corepack enable
corepack install --global pnpm@latest
pnpm --version
如果本机没有 Corepack,也可以直接安装:
npm install --global pnpm
pnpm --version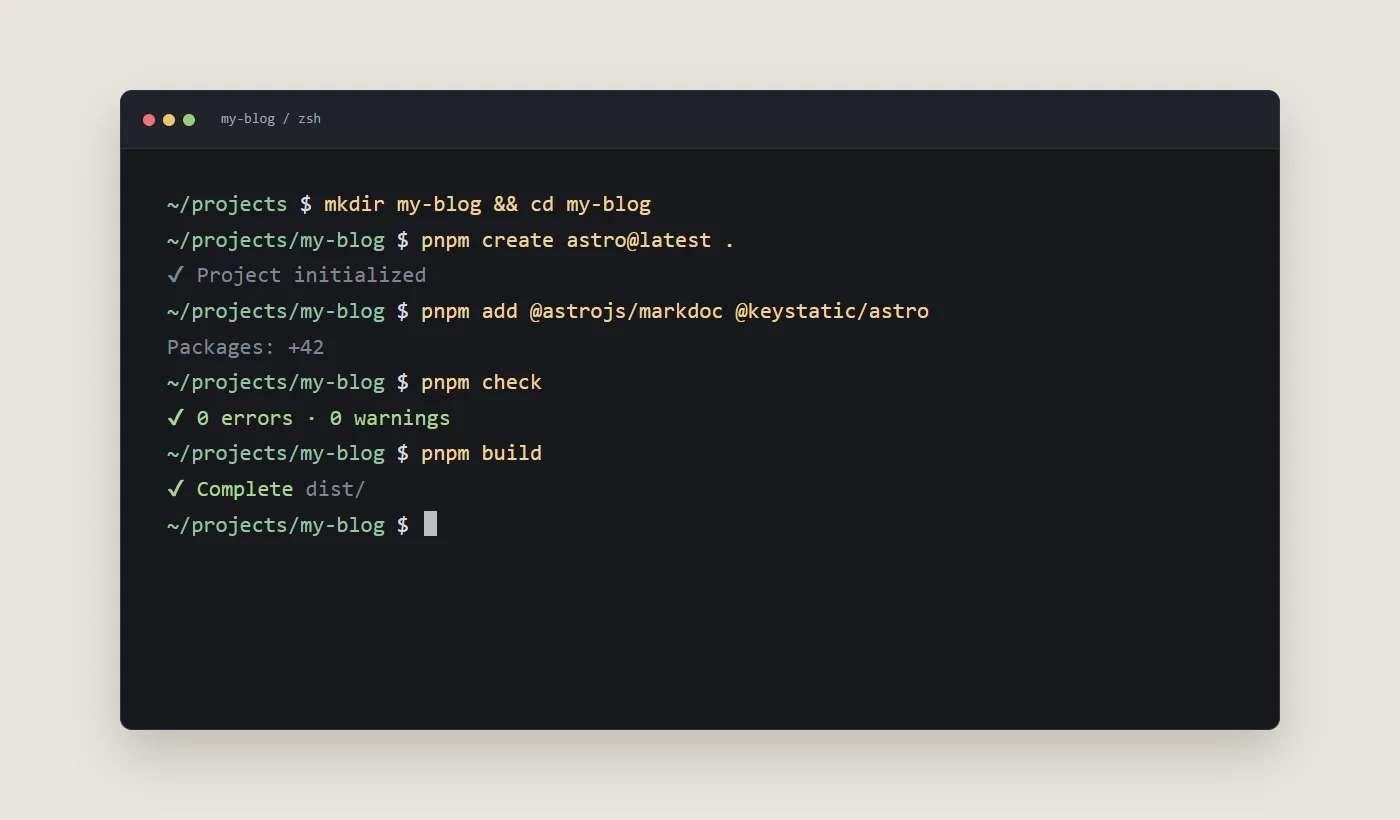
团队项目需要锁定 pnpm 版本时,再把 packageManager 字段写入自己的 package.json,并让 CI 使用同一个版本。
初始化 Astro 项目
新建项目目录,然后运行 Astro 官方脚手架:
mkdir my-blog
cd my-blog
pnpm create astro@latest .
向导会询问模板和 TypeScript 选项。想从最少的文件开始,可以选择空项目,再按需要补页面和样式。
接着安装 Markdoc、React、Keystatic,以及一个部署 adapter。下面以 Vercel 为例:
pnpm add @astrojs/markdoc @astrojs/react react react-dom
pnpm add @keystatic/astro @keystatic/core
pnpm add @astrojs/vercel
pnpm add -D @astrojs/check typescript
React 只负责 Keystatic 管理界面,博客正文仍由 Astro 输出。这里选择 Vercel,是因为线上 Keystatic 的登录和写入 API 需要 Node.js 运行时;只部署公开静态站点时,后文会单独说明 Cloudflare Pages 的边界。
在 astro.config.mjs 中接入这些集成:
import { defineConfig } from 'astro/config';
import markdoc from '@astrojs/markdoc';
import react from '@astrojs/react';
import vercel from '@astrojs/vercel';
import keystatic from '@keystatic/astro';

export default defineConfig({
  adapter: vercel(),
  image: {
    layout: 'constrained',
    objectFit: 'contain',
    responsiveStyles: true,
  },
  integrations: [react(), markdoc(), keystatic()],
});
一个配置文件只保留一个部署 adapter。不要在没有验证 API 运行时的情况下直接互换 adapter,否则公开页面虽然可能正常,线上编辑和 GitHub OAuth 仍可能失败。
定义文章内容模型
Astro 的内容集合负责读取文章,也负责在构建时检查字段。创建 src/content.config.ts:
import { defineCollection } from 'astro:content';
import { glob } from 'astro/loaders';
import { z } from 'astro/zod';

const posts = defineCollection({
  loader: glob({
    base: './src/content/posts',
    pattern: '**/*.{md,mdoc}',
  }),
  schema: ({ image }) =>
    z.object({
      title: z.string(),
      description: z.string(),
      publishedAt: z.coerce.date(),
      draft: z.boolean().default(false),
      tags: z.array(z.string()).default([]),
      cover: image().optional(),
      coverAlt: z.string().optional(),
      coverLayout: z.enum(['portrait', 'landscape', 'bleed']).default('portrait'),
    }),
});

export const collections = { posts };
之后在 src/content/posts 新建 first-post.mdoc。文件头部填入标题、摘要、日期和标签,正文直接写在第二个 --- 之后。将 draft 设为 true 的文章不会出现在公开列表里。
配置 Keystatic
Keystatic 的配置文件是 keystatic.config.ts。下面这份配置把文章保存到 src/content/posts,并把 WebP 图片放到 src/assets/images/posts:
import { collection, config, fields } from '@keystatic/core';

const useGitHubStorage =
  import.meta.env.PROD || import.meta.env.PUBLIC_KEYSTATIC_GITHUB_MODE === 'true';

export default config({
  storage: useGitHubStorage
    ? {
        kind: 'github',
        repo: { owner: 'your-github-username', name: 'my-blog' },
      }
    : { kind: 'local' },
  collections: {
    posts: collection({
      label: '文章',
      slugField: 'title',
      path: 'src/content/posts/*',
      format: { contentField: 'content' },
      schema: {
        title: fields.slug({
          name: {
            label: '标题',
            validation: { isRequired: true },
          },
        }),
        description: fields.text({
          label: '摘要',
          multiline: true,
          validation: { isRequired: true },
        }),
        publishedAt: fields.date({
          label: '发布日期',
          validation: { isRequired: true },
        }),
        draft: fields.checkbox({
          label: '草稿',
          defaultValue: true,
        }),
        tags: fields.array(fields.text({ label: '标签' }), {
          label: '标签',
        }),
        cover: fields.image({
          label: '封面',
          directory: 'src/assets/images/posts',
          publicPath: '../../assets/images/posts/',
        }),
        coverAlt: fields.text({
          label: '封面替代文字',
        }),
        content: fields.markdoc({
          label: '正文',
          options: {
            image: {
              directory: 'src/assets/images/posts',
              publicPath: '../../assets/images/posts/',
            },
          },
        }),
      },
    }),
  },
});
此时运行开发服务器:
pnpm dev博客通常在 http://localhost:4321/,Keystatic 后台在 http://localhost:4321/keystatic。开发环境默认使用 local 存储,后台保存动作会直接修改本地文件。生产构建则自动使用 GitHub 存储,让线上后台把改动提交回仓库。需要在本地验证 GitHub 登录时,可在 .env 中设置 PUBLIC_KEYSTATIC_GITHUB_MODE=true。
写首页和文章页
首页先读取非草稿文章,再按发布日期排序。核心代码可以写成这样:
---
import { getCollection } from 'astro:content';

const posts = (await getCollection('posts', ({ data }) => !data.draft)).sort(
  (a, b) => b.data.publishedAt.valueOf() - a.data.publishedAt.valueOf(),
);
---

{posts.map((post) => (
  <a href={`/posts/${post.id}/`}>{post.data.title}</a>
))}
文章页通过 getStaticPaths 为每篇文章生成路由,再调用 render(post) 得到正文组件。封面由内容集合的 image() 解析为图片元数据,再交给 astro:assets 的 <Image> 输出响应式 WebP。coverLayout 可以按文章选择 3:5 竖幅、16:9 横向或 2:1 满版构图,版式不会裁切图片。正文图片也使用从文章文件出发的 ../../assets/images/posts/... 相对路径,Markdoc 会把它们交给同一图片管线。
本地检查
提交前跑检查和生产构建。pnpm check 会先拒绝文章图片目录中的非 WebP 文件,再执行 Astro 类型检查:
pnpm check
pnpm build
check 会报告 Astro 和 TypeScript 问题,build 会生成部署产物。文章、图片或内容 schema 有问题时,尽量在这里解决,不要等平台构建失败后再回头找原因。
部署到 Vercel
使用 @astrojs/vercel 时,可以按下面的流程部署:
- 把自己的项目推送到 GitHub。
- 在 Vercel 新建项目,导入这个 GitHub 仓库。
- Framework Preset 选择 Astro,或接受 Vercel 的自动识别。
- Build Command 填
pnpm build,Install Command 填pnpm install。 - 部署成功后,再绑定自己的域名。
每次推送生产分支,Vercel 会重新构建。Pull Request 通常也会得到一个预览地址。项目需要 GitHub 存储模式时,把 GitHub App 的环境变量填到 Vercel 项目设置里,不要提交到仓库;变量更新后需要重新部署。
本项目需要配置四个变量:
KEYSTATIC_GITHUB_CLIENT_ID=
KEYSTATIC_GITHUB_CLIENT_SECRET=
KEYSTATIC_SECRET=
PUBLIC_KEYSTATIC_GITHUB_APP_SLUG=
GitHub App 只安装到目标仓库,并授予仓库内容读写所需的最小权限。生产 OAuth 回调地址为 https://<production-domain>/api/keystatic/github/oauth/callback。授权用户进入 /keystatic 后选择 main,保存会生成一笔同时包含文章和图片的提交;Vercel 观察到 main 更新后会自动部署。
/keystatic 不需要通过改名或删除来“隐藏”,但不要把它放进公开导航。未登录用户可能看到 GitHub 登录入口,真正的访问控制来自 GitHub 身份和私有仓库写权限。管理页面和 API 还应返回 X-Robots-Tag: noindex, nofollow, noarchive 与 Cache-Control: no-store,防止索引和缓存。
部署到 Cloudflare Pages
Cloudflare Pages 适合只托管公开博客。最省事的方式是使用 Git 集成:在 Pages 中连接 GitHub 仓库,构建命令填写 pnpm build,输出目录填写 dist,再在构建设置中固定 Node.js 和 pnpm 版本。以后推送到指定分支,Pages 会自动重新构建。
当前项目的 astro.config.mjs 使用 Vercel adapter,并通过 keystatic() 注入线上编辑页面。如果要做 Cloudflare Pages 的公开版本,需要单独使用静态配置,移除 Vercel adapter 和 Keystatic integration,保留博客页面和 Markdoc 内容。这样 /keystatic 不会随站点发布,图片也会作为静态文件由 Cloudflare 分发。
如果还要在线编辑文章,继续使用 Vercel 更合适。Keystatic 的 GitHub 登录和保存接口需要 Node.js 运行时,不能只替换 adapter 就直接搬到 Cloudflare Pages。
Keystatic 的线上存储
local 模式依赖本地文件系统,适合开发,不适合把线上运行环境当成文章数据库。博客在生产构建时切换为 GitHub 模式:Keystatic 通过 GitHub OAuth 检查仓库权限,再把保存结果提交到 your-github-username/my-blog 的 main 分支。这样仓库仍是内容事实来源,Vercel 只负责运行后台和根据新提交重新部署。
图片放在 src/assets/images/posts,源文件统一使用 WebP。Astro 在构建时读取真实宽高,并为首页、文章页和正文生成对应的响应式候选尺寸;浏览器只下载当前布局需要的版本。当前媒体规模很小,把图片单独搬到对象存储不会自动变快,反而需要额外处理上传、URL 和删除同步。
当媒体库明显增长、Git 仓库开始膨胀,或者需要独立上传和动态缩放时,再考虑 Cloudflare R2 配合 Cloudflare Images。当前 R2 免费层包含 10 GB-month 存储、每月 100 万次 Class A 和 1000 万次 Class B 操作,互联网出站流量免费;Images Free 提供每月最多 5000 个唯一转换。它们适合第二阶段的媒体管线,但不能直接替代 Keystatic 当前的 Git 图片字段。
上线前检查
预览地址打开后,我会按这个顺序检查:
- 首页、文章页和后台路径能否打开;
- 手机宽度下标题、图片和代码块是否溢出;
- 封面、正文图片和 favicon 是否返回
200; - 页面标题与 description 是否来自文章数据;
- 推送一笔小改动,确认自动部署仍然触发。
完成这些检查后,新增文章只需要创建一个内容文件。评论、RSS、搜索和统计可以按实际需要再加,不必在第一天全部装上。